Monday 28 April 2014

❤ D.I.Y ❤ Urban Outfitters Inspired Pastel Frames ❤


Hey!
 I'm bringing you another Super Great D.I.Y That's Cheap and Cheerful for all you Uni Students looking to put color into your Dorm Rooms! 


You Will Need :
❤ Acrylic Paint Assorted Colors & White!
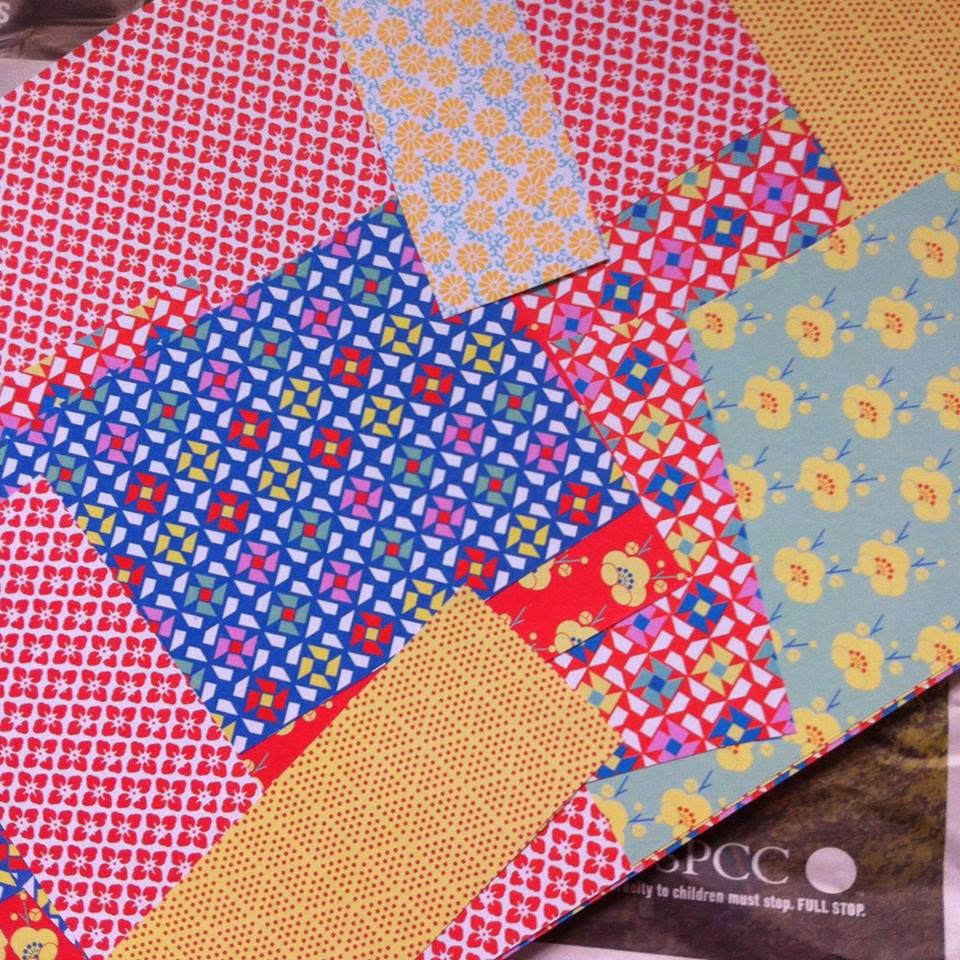
❤  Patterend Paper
❤ Frames (CHARITY SHOP!)
❤ Ribbon (For hanging)


Step One:

Get hold of an assortment o frames from your local Charity shop, There's no point in new ones, once they're all painted they'll look awesome! I got all of the ones above for under £4!
Super cheap and good for the world!

You'll need to disassemble the frame so you just have the brim. Like this;


Step 2:

Now it's time to paint! Choose a white paint to begin with & base coat your frame! It might help to sand the frame first if the frame is proving difficult!


Once you have applied two or more white coats and allowed them to dry, It's time for color!

Step Three:

Choose your colors, I had loads but I went for a pastel purple, green & pink! I mixed these from white paint, red, blue & green!


Apply around 1-2 Layers, making sure you get into all of the details!


If the drying gets a little tedious to wait around for, speed up the process with a hairdryer.. a little trick we use in college for scenic design!


Step Four:

Now your frames are painted, you'll probably need to give the glass inserts a good clean with some window cleaner...trust me!


If your photo doesn't quite fit the frame, you can fill the spaces with some colorful paper.


Choose a pattern that you think fit the photo.. or go wild a clash the colors!


Take the glass inset and draw around it onto the paper, then cut it out. You might need to go half a centimeter smaller just to fit it properly.


Step Five:

Place the glass insert into the frame and put the photo face down onto it, then lay the paper pattern facing down on top!


You then might have to re-seal the ram like this with masking tape, or you have to press the frame latches back down with a knife.


If you're hanging these frames up and there's no hook for them, Why not try attaching sweet Ribbon to the back with a few staples each side, It adds a Kitsch look when the ribbon shows. Good or that 'Awww' factor!


And that's pretty much it! They look so cute & unless you tell someone (my secrets out) friends will be asking where you got these adorable frames from for sure!


Thank you for Reading!
Lovelove
xxx


Saturday 19 April 2014

❤ Real Techniques Make-up Brushes | Where to find them Cheapest ❤

So today I bring you a momentous Blog Post, for I have found a great Deal on these Real Techniques Make Up Brushes, bought to us by the ever famous Pixiwoo Sisters on YouTube!

I had seen You-Tubers and Bloggers alike rave about these fantastic brushes and I pined over them so much! I needed to get myself some, trouble was they set you back a fair bit retailing at the around the £15-£18 mark for each set.

I instantly set to the internet to compare prices from different websites, You know me.. I'm kinda Cheap! I blame it on my Pops' frugal-ness! It's doing me well though!

I stumbled along an online Chemist, Called Gordons Direct that happened to be selling the brushes for an astonishingly cheap price! Of course, me being me I had to check that this wasn't a scam and went down hundreds of reviews from the business and IT WAS LEGIT!

Much to my happiness I found the entire collection which you can view and purchase HERE !!

I chose to get the Core Collection & The Eyes enhanced Starter Set. Both of which have actually dropped more in Price since I ordered last Friday! P&P Is £3 and they take around 5 Days to arrive to London from Ireland.

Here's some pictures for those curious on their condition!


The Core Collection Includes:

Detailer Brush
 Pointed Foundation Brush
 Buffing Brush
 Contour Brush


The Eye Enhancer Set Includes:

Base Shadow Brush
Deluxe Crease Brush
Accent Brush
Pixel Point Eyeliner Brush
Brow Brush


As you can see, all of the brushes are extremely plush and fluffy, Such good condition and worth how much I paid.

I feel like if I had paid more for these or RRP It would of been slightly disappointing..

Anyway, RUN MY PRETTIES! GET THEM WHILE THEY'RE SUPER CHEAP!

Love Love
xxxx


Friday 18 April 2014

❤ A Tiny Thrift Haul | April 2014 ❤

Okay... so I can't stop shopping! I blame it on the two week break i'm on from college.. I have nothing else to do!

I met my Girl Alana for a Walk around London and a Shcmooze in some Vintage & Charity Shops! We also went to Five Guys in Islington, and it was good! But not the best I've had... 3.5 Stars! haha!

Isn't Alana the Cutest! 


Burger Porn!!!!!!!

Anyway, Let's get down to the Thrifted Goods :)


American Apparel 'Figure Skater' Dress
Retails for : £44
I paid £3!!!

I found this dress in a Charity Shop for £3! I couldn't believe it! There was something spilled down the front.. I didn't care to think what it was (squirms) But I knew that a good blast with some Vanish through the washing machine would do it so there was no leaving it behind!!


Kitsch Jewelry Pieces
25p Each
Oxfam

We went to Oxfam and I was perusing the isles when I saw a sign for these random Jewelry pieces. I had a nosey and they were all so Kitsch and cute! I eventually decided on these two, Head Girl being a nice decal for a preppy Cardigan? I'll probably put the 'Save Me' Anchor on my Keys!


Sparkly Brooch
£2.99
Traid

Whilst in Traid, I saw this lovely and unusual brooch! It's so statement and such a different color! I loved it,and it's a snap at £2.99!
I recommend the Traid in the Bethnal Green/Hackney area it's full of really trendy labels including lots of Topshop cast offs!

I absolutely loved all of the bits I got! and had a lovely day! 

Lastly,My sister gave me this pretty dress! It's love label frm Topshop and she hasn't worn it! I think it's lovely!


Floral Chiffon Dress
£18.00
Love Label @ Topshop

That's all for now lovlies! 
xxxx


| My New Hair Color & How I achieved it |

Hey guys! I've had a change of hair! It's now a crazy (but awesome) Orange-Ginger Color and I absolutely love it!

I was feeling my black hair as a bit plain Jane, and I felt far too comfortable! Of course Black is the easiest color to dye & Maintain, so it wasn't as though I couldn't return to from where I came!

SO. I'd thought about returning to blonde again, and Then I thought about that awkward ginger phase between bleaches and THEN, I decided to be purposely ginger between bleaching my hair!

And now, for the first part... the inevitable. Getting rid of the Black pigment.


I had read up about Colour B4 thoroughly and I finally felt confident enough to try it to get rid of all of the black. I picked up a box of the extra strength mix at Savers for around £6.99! A total bargain as everywhere else sells it for £12.99.

I was really worried that I would mess up this part, The way the process works is you apply the mixture to you hair and leave it on for 1 Hour, during which it 'Shrinks' the Black pigment of you hair ready to be washed out during the buffering process.
I really had at during that buffering/washing out process and I managed to do it right!

I went from this:

To This:

(Excuse the rough photo!)
Absolutely every bit of Black was washed out of my hair! I am so impressed with this product and will use it again!

So the next step was to take my hair from a Dark Brown to a light brown/Blonde!

In my absolute and honest opinion, I would SKIP this part and straight up bleach.
However, I'll tell you what I did anyway!
I picked up a Box of L'Oreal Paris Perfect Blonde Lighting Cream in Maximum for around £6.99 in Savers, to lighten my hair from a Dark Brown. 


After applying this and washing it off, My hair ended up like this.


It was super Red and still quite brown, I think it was a waste of time, You be the Judge! :)

Anyhow, HERE COMES THE BLEACH.


SO, I waited a while after using L'Oreal Maximum Blonde and I went to the Big Guns. I picked up a Box of Jerome Russel BBlonde,My go-to Hair bleach for £3.99-ish. The 40 vol Developer was around £1.69.
 Mr.Bleach, Meet Mrs.Hair. You'll be lovely companions.

I mixed up a butt load of bleach in a Mixing bowl and slapped it on my hair. Sounds so angry but I literally sapped it on with the Tinting brush haha. I put a plastic bag over it all (classy) and applied a low heat with a hair dryer for around 5 minutes throughout to speed up the lightening process.

This is how my First Bleach came out :


Somehow, even though I thoroughly distributed the mixture, I ended up with random dark patches that wouldn't budge.
I decided to bleach them again that day,(tut tut slap my wrist I know you should wait a week....)

They slightly lifted to a lighter brown, and the majority of my hair went to a very pale Orange! Which was ok!

From here I thought POO IT! I'm going orange right now!


I have been stockpiling this Live Color XXL Ultra Brights hair dye in Fiery Copper for a while ever since deciding I wanted to go Orange. I saw it in the 99p store and I pounced! It was like £5 everywhere else so of course i'm going to grab it off of the shelf with a vengeance!

SO, I went from a pale ginger with very Blonde roots and slightly Darker orange hues through out... to this:


AND I FLIPPING LOVE IT!

It's still a work in progress... and I've had many a strange look, but Good.let them stare! I feel fabulous and cheeky! I'm a cheeky red head! woohoo!

I hope that this was slightly helpful?
Any how! Feel free to ask me any questions!

LOVE LOVE
xxx